
Sebbene Excel non abbia una funzionalità di word cloud integrata, puoi crearla Nuvole di parole di Excel facilmente utilizzando una qualsiasi delle 3 tecniche seguenti:
Metodo 1: utilizzare un componente aggiuntivo di Excel
Il metodo più integrato è quello di utilizzare un componente aggiuntivo, che consente di creare una nuvola di parole direttamente all'interno del foglio di calcolo Excel. Un'opzione popolare e gratuita è Bjorn Word Cloud. Puoi cercare altri strumenti per la creazione di nuvole di parole nella libreria dei componenti aggiuntivi.
Passaggio 1: prepara i tuoi dati
- Inserisci tutto il testo che vuoi analizzare in un'unica colonna. Ogni cella può contenere una o più parole.
Passaggio 2: installa il componente aggiuntivo "Bjorn Word Cloud"
- Vai inserire scheda sulla barra multifunzione.
- Fare clic su Ottieni componenti aggiuntivi.
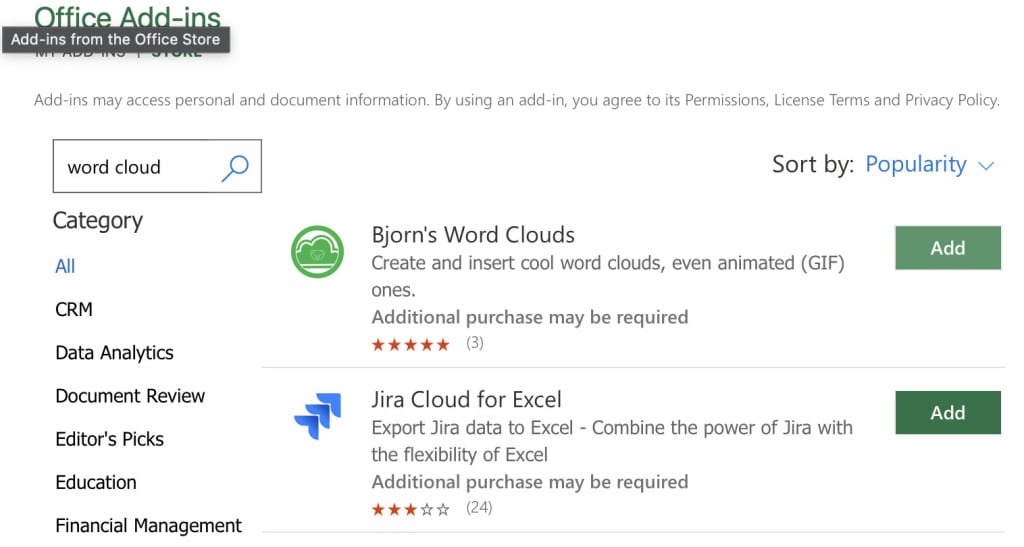
- Nello store dei componenti aggiuntivi di Office, cerca "Bjorn Word Cloud".
- Clicca su Aggiungi pulsante accanto al componente aggiuntivo Pro Word Cloud.
Passaggio 3: Genera la nuvola di parole
- Vai inserire scheda e fare clic su I miei componenti aggiuntivi.
- Seleziona Nuvola di parole di Bjorn per aprire il pannello corrispondente sul lato destro dello schermo.
- Il componente aggiuntivo rileverà automaticamente l'intervallo di testo selezionato. Fare clic su Crea una nuvola di parole pulsante.
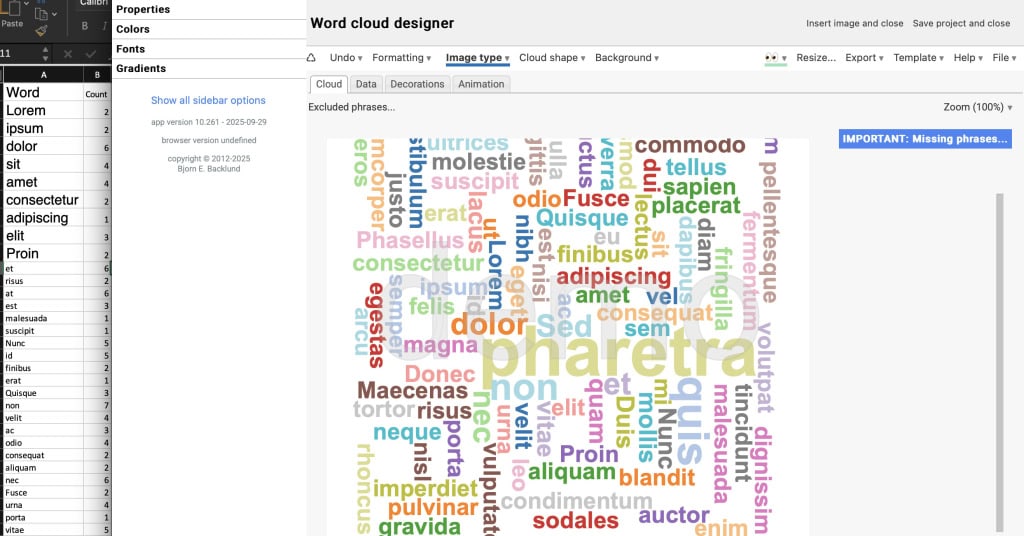
Passaggio 4: personalizza e salva
- Il componente aggiuntivo offre diverse opzioni per personalizzare il carattere, i colori, il layout (orizzontale, verticale, ecc.) e le maiuscole/minuscole delle parole.
- Puoi anche regolare il numero di parole visualizzate e filtrare le "stop word" più comuni (come "the", "and", "a").
- La nuvola di parole apparirà nel pannello. Puoi esportarla come SVG, GIF o pagina web.
Metodo 2: utilizzare un generatore di nuvole di parole online gratuito
Se non vuoi installare un componente aggiuntivo, puoi utilizzare uno strumento online gratuito. Questo metodo offre spesso opzioni di personalizzazione più avanzate.
Passaggio 1: preparare e copiare i dati in Excel
- Organizza tutto il testo in un'unica colonna.
- Evidenzia l'intera colonna e copiala negli appunti (Ctrl+C).
Passaggio 2: utilizzare uno strumento online
- Vai su un sito web generatore di nuvole di parole gratuito, come Generatore di nuvole di parole AhaSlides, oppure https://www.google.com/search?q=FreeWordCloud.com.
- Cerca l'opzione "Importa" o "Incolla testo".
- Incolla il testo copiato da Excel nella casella di testo fornita.

Passaggio 3: Genera, personalizza e scarica
- Fare clic sul pulsante "Genera" o "Visualizza" per creare la nuvola di parole.
- Utilizza gli strumenti del sito web per personalizzare caratteri, forme, colori e orientamento delle parole.
- Una volta che sei soddisfatto, scarica la nuvola di parole come immagine (solitamente PNG o JPG).
Metodo 3: utilizzare Power BI
Se hai Power BI pronto sul tuo desktop, questo potrebbe essere un modo valido ma più avanzato per generare word cloud di Excel quando devi elaborare una grande quantità di parole.
Passaggio 1: preparare i dati in Excel
Per prima cosa, è necessario organizzare correttamente i dati di testo in un foglio Excel. Il formato ideale è una singola colonna in cui ogni cella contiene le parole o le frasi che si desidera analizzare.
- Crea una colonna: Inserisci tutto il testo in un'unica colonna (ad esempio, Colonna A).
- Formato come tabella: Seleziona i tuoi dati e premi Ctrl + TIn questo modo, il file verrà formattato come una tabella Excel ufficiale, che Power BI potrà leggere più facilmente. Assegna alla tabella un nome chiaro (ad esempio, "WordData").
- Salva il tuo file Excel.
Passaggio 2: importa il file Excel in Power BI
Quindi, apri Power BI Desktop (che è un download gratuito da Microsoft) per connetterti al tuo file Excel.
- Apri Power BI.
- Sulla Casa scheda, fare clic Ottieni dati e seleziona Cartella di lavoro di Excel.
- Trova e apri il file Excel appena salvato.
- Nel Navigator Nella finestra che appare, seleziona la casella accanto al nome della tua tabella ("WordData").
- Clicchi CaricareI tuoi dati appariranno ora nel Dati riquadro sul lato destro della finestra di Power BI.
Passaggio 3: creare e configurare la nuvola di parole
Ora puoi creare l'immagine vera e propria.
- Aggiungi l'immagine: Nel visualizzazioni riquadro, trova e fai clic su Word Cloud icona. Un modello vuoto apparirà sulla tela del report.
- Aggiungi i tuoi dati: Dal Dati riquadro, trascina la colonna di testo e rilasciala nel Categoria campo nel riquadro Visualizzazioni.
- Creare: Power BI conterà automaticamente la frequenza di ogni parola e genererà il word cloud. Più una parola è frequente, più grande apparirà.
Consigli
- Per prima cosa, pulisci i dati: rimuovi le stop word (come "e", "il", "è"), la punteggiatura e i duplicati per ottenere risultati più chiari.
- Se il testo è in più celle, utilizzare formule come
=TEXTJOIN(" ",TRUE,A1:A50)per combinare tutto in un'unica cella. - Le nuvole di parole sono ottime per la visualizzazione, ma non mostrano conteggi di frequenza esatti: per un'analisi più approfondita, si consiglia di abbinarle a una tabella pivot o a un grafico a barre.