



Short answer: yes, PowerPoint can make a timeline on its own. Go to Insert > SmartArt > Process, pick Basic Timeline, and type your dates and events into the text pane. For more control, draw a line and add circles with Insert > Shapes, or start from a ready-made timeline template, like the free one below.
A timeline is one of the few slides people remember, because it turns a pile of dates into a story with a beginning, a middle and a “what’s next”. This guide covers the three PowerPoint-only ways to build one, where a timeline falls short when you present it to a group, and how to let people put the events in order themselves.
Get the free PowerPoint timeline template
We built a three-slide template you can download and edit in PowerPoint on Windows, Mac or the web. Every line, circle and label is a normal shape or text box, so you change a year by clicking on it.
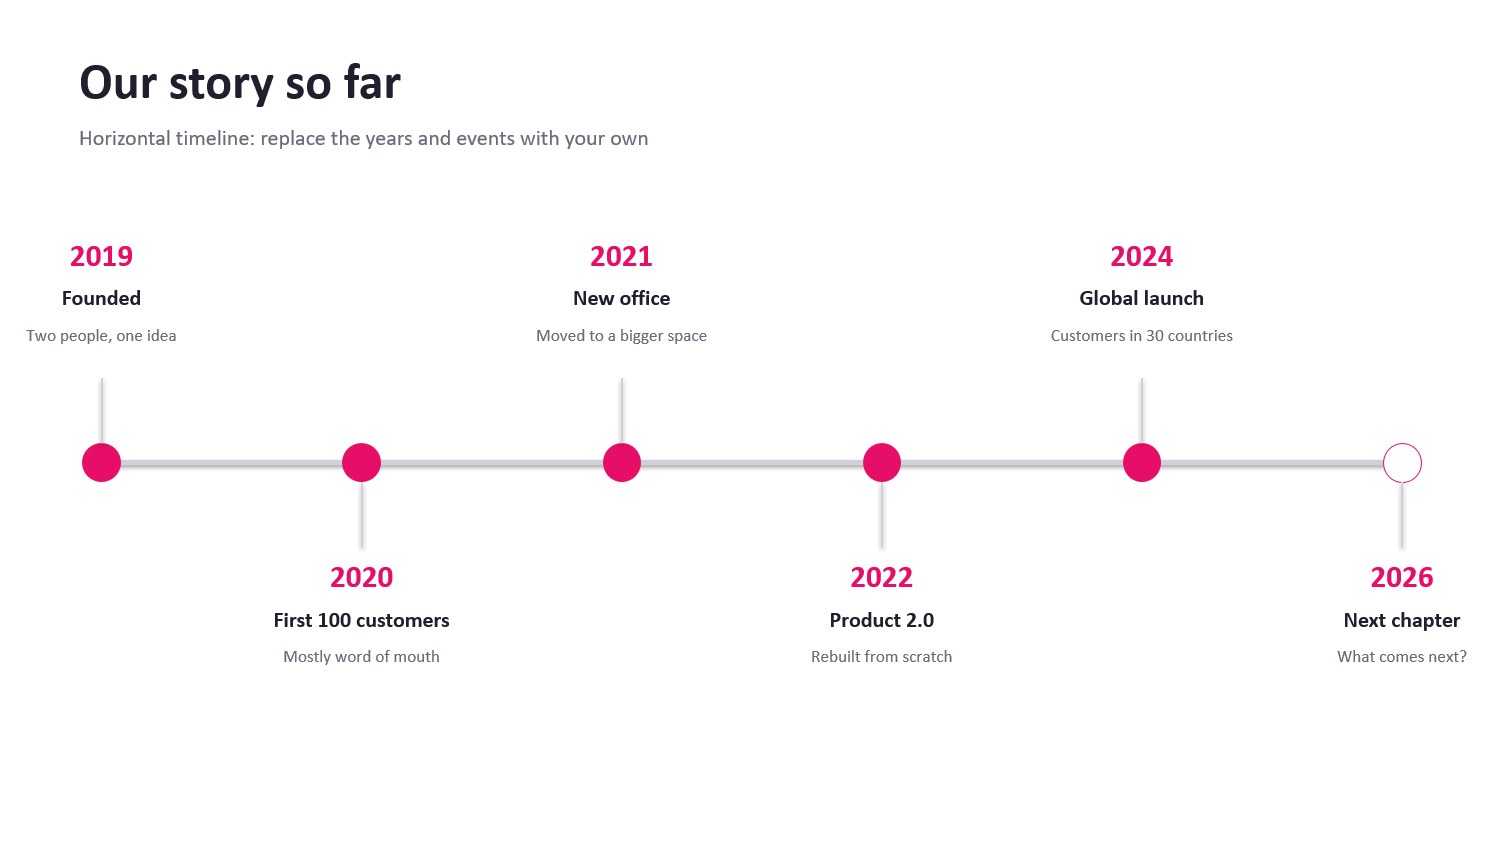
- Our story so far: a horizontal timeline with six milestones, alternating above and below the line.
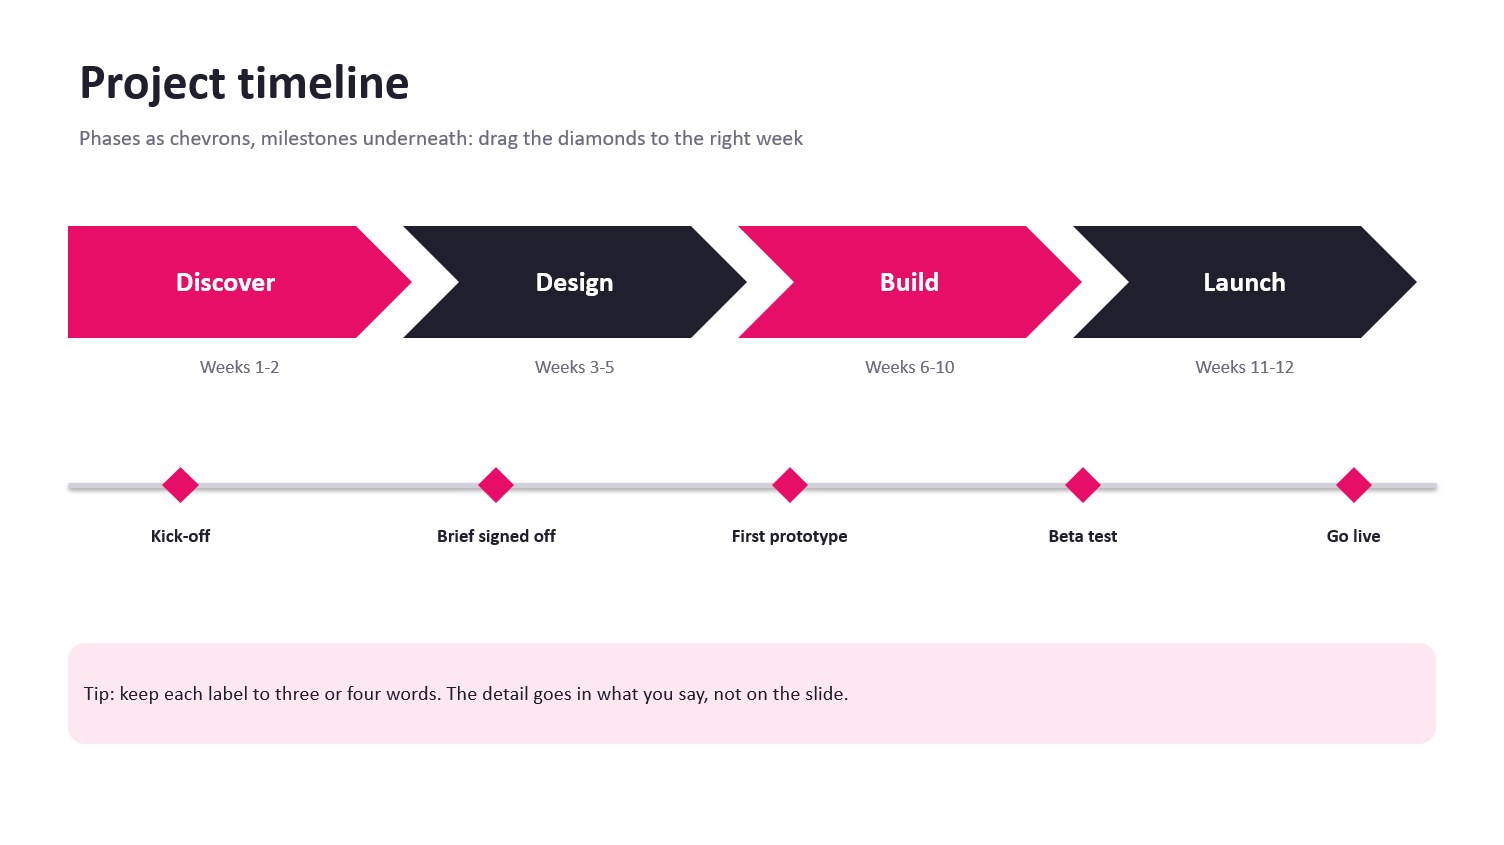
- Project timeline: four phases as chevrons, with milestones as diamonds underneath.
- Vertical timeline: five steps from top to bottom, good for processes and onboarding.
How to make a timeline in PowerPoint with SmartArt
SmartArt is the quickest way to make a simple timeline in PowerPoint. It lines your events up, spaces them evenly and keeps them in line when you add more. These steps follow Microsoft’s own guide and work in PowerPoint for Microsoft 365 and PowerPoint 2016 to 2024. In PowerPoint for the web, pick a timeline layout under Insert > SmartArt and press Enter after each entry to add the next point.
- Open the slide you want the timeline on and go to Insert > SmartArt.
- Choose Process on the left, then pick Basic Timeline (a line with dots) or Circle Accent Timeline (circles of different sizes). Select OK.
- Click each [Text] placeholder and type a date or an event. To type everything in one list, open the Text Pane with the small arrow on the left edge of the graphic.
- To add a date, select the nearest shape, then go to SmartArt Design > Add Shape and choose Add Shape After or Add Shape Before. Pressing Enter in the text pane does the same.
- To reorder events, select one and use Move Up or Move Down on the SmartArt Design tab.
- Style it with Change Colors and the SmartArt Styles gallery on the same tab. To try a different shape, open Layouts and hover over Accent Process or Continuous Picture List.
Already have your dates as bullet points? On Windows, select the text box and choose Home > Convert to SmartArt, then pick a timeline layout. Your bullets become the milestones.
Keep a SmartArt timeline to about eight events with short labels. Past that, the text shrinks to fit and gets hard to read from the back of a room.
How to insert a timeline in PowerPoint from a template
PowerPoint ships with timeline templates, so you don’t have to start from a blank slide.
- Windows: go to File > New, type “timeline” in the search box and press Enter. Pick a design and select Create.
- Mac: go to File > New from Template, then search for “timeline”.
- Web: open the template gallery at create.microsoft.com, filter to PowerPoint and open a design in PowerPoint for the web.
A template opens as a new presentation. To use the timeline in a deck you already have, copy the slide and paste it into your deck with Keep Source Formatting, or use Home > Reuse Slides on Windows, in versions that include it.
How to make a timeline in PowerPoint with shapes
Drawing your own timeline takes longer, but nothing limits the layout. This is how the template above was made.
- Go to Insert > Shapes, pick the line, and hold Shift while you drag across the slide to keep it straight.
- Add a circle for each event: choose the oval from Insert > Shapes and hold Shift as you drag to keep it round. Copy it with Ctrl+D (Cmd+D on a Mac).
- Select all the circles, then go to Shape Format > Align and choose Align Middle, then Distribute Horizontally. The circles now sit on the line with equal gaps.
- Add a text box above or below each circle for the date and a short label. Alternate above and below when the labels are long.
- Group everything with Ctrl+G (Cmd+Option+G on a Mac) so it moves as one piece.
Make it build as you talk. Select the line and choose Animations > Wipe, then Effect Options > From Left. Give each milestone an Appear animation set to On Click. Each click then reveals the next event, so people listen to the one you are on instead of reading ahead.
Where a PowerPoint timeline stops
A timeline slide tells people the order of events. It can’t tell you whether they took it in. Ask a group to name the year your team launched its second product five minutes after the slide and you get silence, or the one person who already knew.
That matters most where the order is the lesson: the steps of a safety procedure, the stages of a sales process, the history a new starter needs to know. A static slide gives everyone the answer before they’ve had a chance to think about it, and you only learn who missed it when the mistake happens later.
The fix is to flip the slide. Show the events shuffled, let everyone put them in order on their phone, then reveal your timeline as the answer.
Let people put the events in order with the AhaSlides add-in
AhaSlides is an all-in-one engagement platform for teams and classrooms. Add it to your timeline deck and everyone puts the events in order on their own phone, with the results on your slide.
Two quick ways to start:
- Upload your deck. Upload your PowerPoint file to AhaSlides and let AI add polls and quiz questions through it, then add a Correct Order slide for your timeline (AI PowerPoint maker).
- Or keep presenting in PowerPoint. Add the free AhaSlides add-in and put a Correct Order slide next to your timeline. It takes three steps, below.
Three slide types suit a timeline:
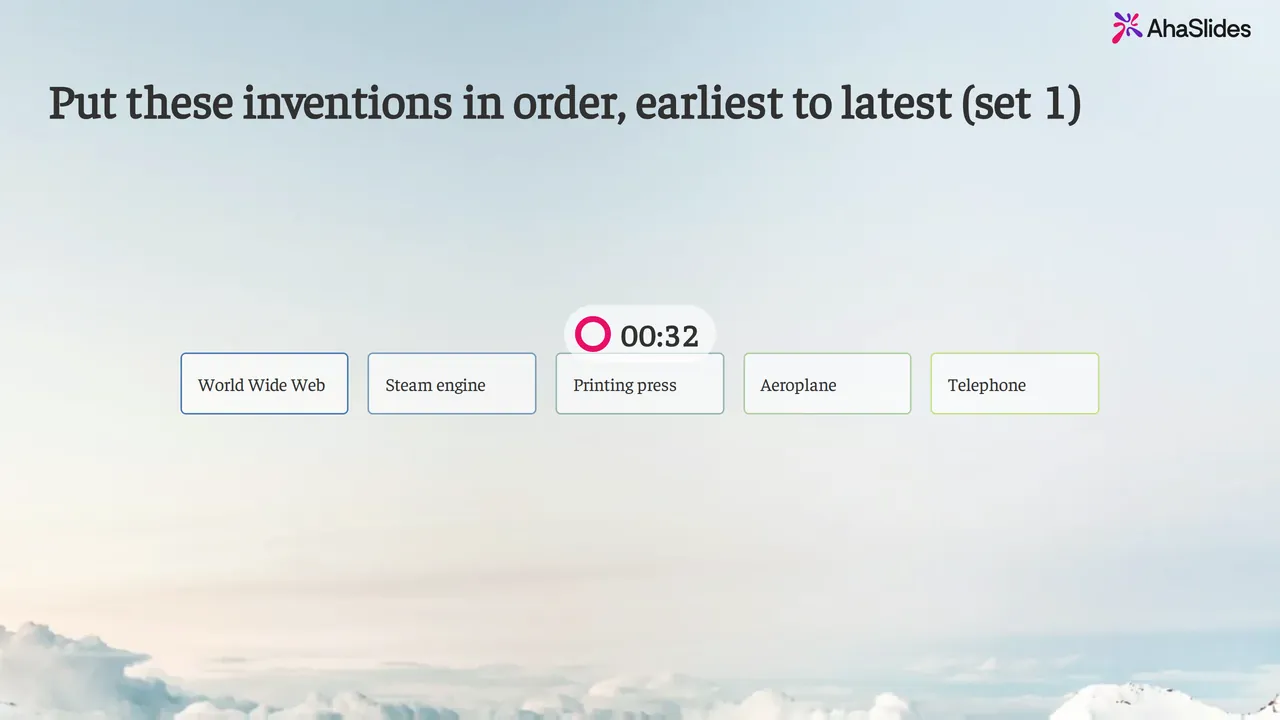
- Correct Order: a scored quiz slide. People drag up to 7 shuffled events into the right sequence on their phones, and only a fully correct order scores.
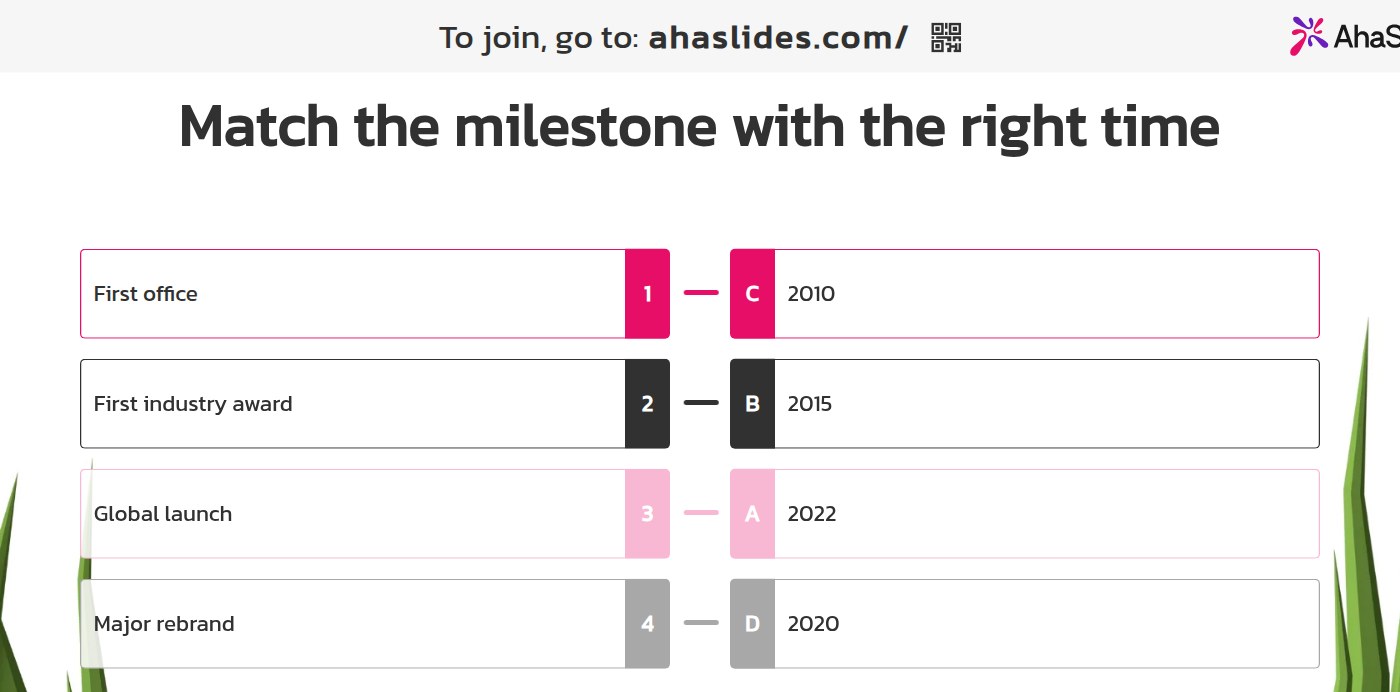
- Match Pairs: people match each milestone to its year or date.
- Ranking: people rank the events by opinion, for example which milestone mattered most to them. There’s no right answer, so it suits a discussion.
Set it up in PowerPoint
- Install it and sign in. In PowerPoint, go to Home > Add-ins > More Add-ins (in PowerPoint for the web, Insert > Add-ins > More Add-ins). Search for AhaSlides, select Add, then open the add-in and sign in, or create a free account.
- Add your timeline question. In AhaSlides, add a Correct Order slide with your events in the right order; AhaSlides shuffles them for each person. In PowerPoint, add a blank slide before your timeline slide and select it, tick the slides you want and select Add slides. The first goes on the blank slide you're on, and each of the others gets a new slide after it. On the web, you add one slide at a time.
- Present. Keep your PowerPoint timeline on the slide straight after, so it works as the answer reveal. In Slide Show, press Q to show the QR code and join link. People join once and stay connected for every AhaSlides slide in the deck.
Use a ready-made template
To skip the setup, start from our free employee onboarding template on company vision and culture. Its “Match the milestone with the right time” slide pairs four milestones with their years, and it also asks when the company was founded. Swap in your own dates, then add it to PowerPoint with the add-in.
5 ways to use an interactive timeline
- New starter onboarding. Ask people to put your company’s milestones in order before you show the real history. Wrong guesses start conversations about how the company has changed.
- Project kick-off. List the phases of the project shuffled and ask the team to order them. Disagreement on the order is cheaper to find in the kick-off than in week six.
- Safety and compliance training. Put the steps of a procedure, such as an evacuation or a lockout, into a Correct Order slide. Only a fully correct order scores, which matches how the procedure works.
- History or science lessons. Order the events of a period, the stages of a life cycle or the steps of an experiment, then show the timeline slide as the reveal.
- Retrospectives. Use a Ranking slide to ask which moment of the quarter had the biggest effect on the team, then talk through the top three on your timeline.
FAQ
Is there a timeline template in PowerPoint?
Yes. Go to File > New and search for “timeline” on Windows, or File > New from Template on a Mac. PowerPoint’s SmartArt also has two timeline layouts under Process: Basic Timeline and Circle Accent Timeline.
How do I make a simple timeline in PowerPoint?
Use SmartArt. Go to Insert > SmartArt > Process > Basic Timeline, then type one date or event per placeholder. Add more points with SmartArt Design > Add Shape.
Does Microsoft have a timeline maker?
Not as a separate app for presentations. PowerPoint’s SmartArt timelines and templates are the built-in options, and Microsoft Project has a timeline view for project schedules.
Where can I get a free timeline template for PowerPoint?
Download the free editable template at the top of this post. It has a horizontal timeline, a project timeline and a vertical timeline. Microsoft’s template gallery at create.microsoft.com also has free timeline designs.
How do I animate a timeline in PowerPoint?
Give the line a Wipe animation with Effect Options > From Left, then give each milestone an Appear animation set to On Click. Each click reveals the next event.
Make this deck interactive
Polls, quizzes and Q&A inside PowerPoint, set up in minutes. Our step-by-step guide shows how, from installing the add-in to reading the results.
Keep reading
For more ways to get people answering during a PowerPoint talk, see how to run an interactive quiz in PowerPoint, or add a countdown timer in PowerPoint to keep each activity on time. You can also build a timeline quiz on its own with the AhaSlides online quiz maker.