
Struggling to gather feedback or make decisions without data? You're not alone. The good news is, creating an effective survey doesn't require expensive software or technical expertise anymore. With Google Survey Maker (Google Forms), anyone with a Google account can create a survey in minutes.
This step-by-step guide will show you how to tap into the power of Google Survey Maker, ensuring you get the answers you need quickly and efficiently. Let's start making informed decisions the easy way.
Table Of Contents
- Google Survey Maker: A Step-By-Step Guide To Create A Survey
- Tips For Increasing Response Rates
- Key Takeaways
More Tips with AhaSlides
Google Survey Maker: A Step-By-Step Guide To Create A Survey
Creating a survey with Google Survey Maker is a straightforward process that allows you to gather valuable feedback, conduct research, or plan events efficiently. This step-by-step guide will walk you through the entire process, from accessing Google Forms to analyzing the responses you receive.
Step 1: Access Google Forms
- Sign in to your Google account. If you don't have one, you'll need to create it at accounts.google.com.
- Navigate to Google Forms. Open your web browser and head to https://forms.google.com/ or by accessing Forms through the Google Apps grid found in the top-right corner of any Google page.
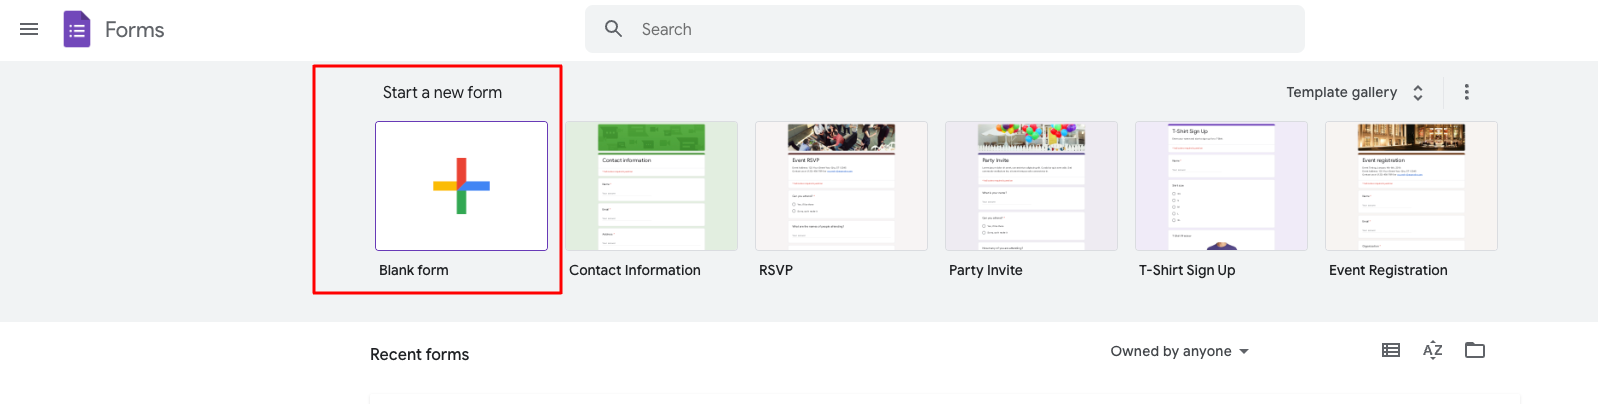
Step 2: Create a New Form
Start a new form. Click on the "+" button to create a new form. Alternatively, you can choose from a variety of templates to get a head start.
Step 3: Customize Your Survey
Title and description.
- Click on the form title to edit it and add a description below to provide context to your respondents.
- Give your survey a clear and descriptive title. This will help people understand what it's about and encourage them to take it.
Add questions.
Use the toolbar on the right to add different types of questions. Simply click on the type of question you want to add and fill in the options.
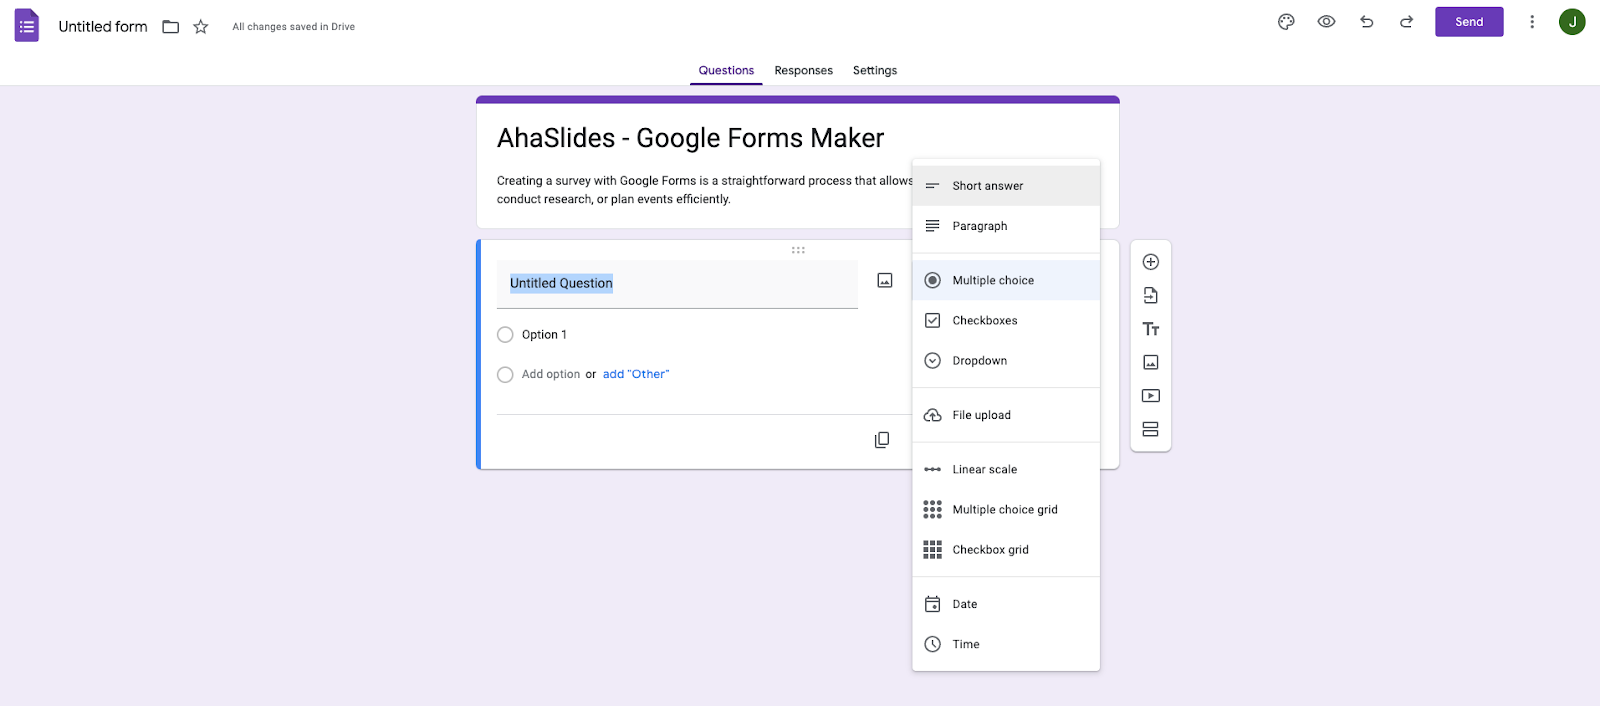
- Short answer: For brief text responses.
- Paragraph: For longer written responses.
- Multiple choice: Choose from several options.
- Checkbox: Select multiple options.
- Dropdown: Choose one option from a list.
- Likert scale: Rate something on a scale (e.g., strongly disagree to strongly agree).
- Date: Pick a date.
- Time: Select a time.
- File upload: Upload documents or images.
Edit questions. Click on a question to edit it. You can specify if the question is required, add an image or video, or change the question type.
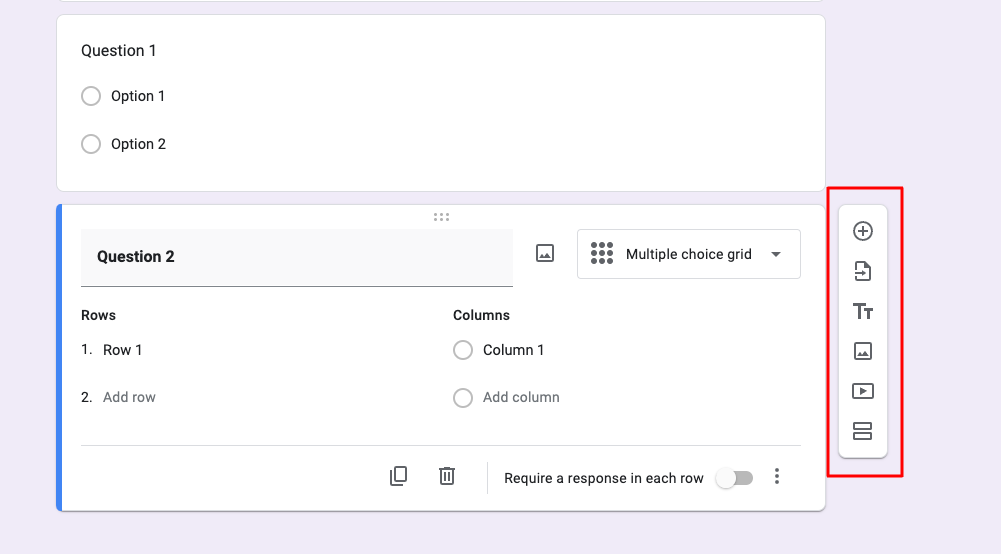
Step 4: Customize Question Types
For each question, you can:
- Make it required or optional.
- Add answer choices and customize their order.
- Shuffle answer choices (for multiple-choice and checkbox questions).
- Add a description or image to clarify the question.
Step 5: Organize Your Survey
Sections.
- For longer surveys, organize your questions into sections to make it easier for respondents. Click on the new section icon in the right toolbar to add a section.
Reorder questions.
- Drag and drop questions or sections to rearrange them.
Step 6: Design Your Survey
- Customize the look. Click on the palette icon in the top-right corner to change the color theme or add a background image to your form.

Step 7: Preview Your Survey
Test your survey.
- Click the "Eye" icon to see how your survey looks before sharing it. This allows you to see what your respondents will see and make any necessary adjustments before sending it out.

Step 8: Send Your Survey
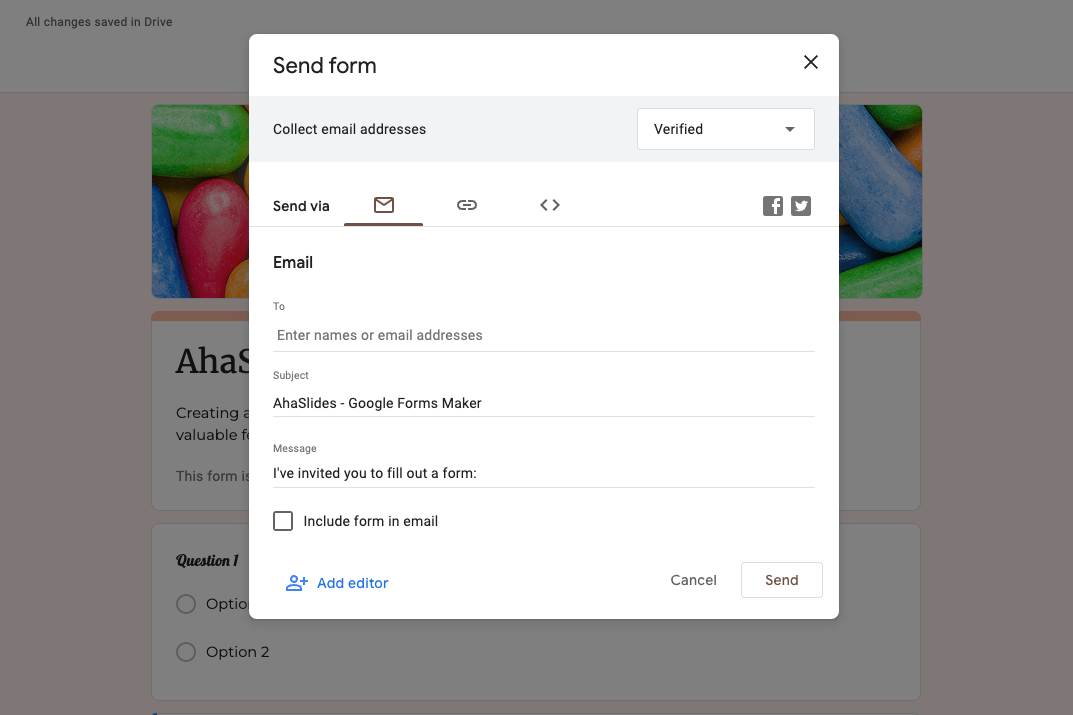
Share your form. Click on the "Send" button at the top-right corner and choose how to share:
- Copy and paste the link: Share it directly with people.
- Embed the form on your website: Add the survey to your webpage.
- Share through social media or email: Use the available buttons.
Step 9: Collect and Analyze Responses
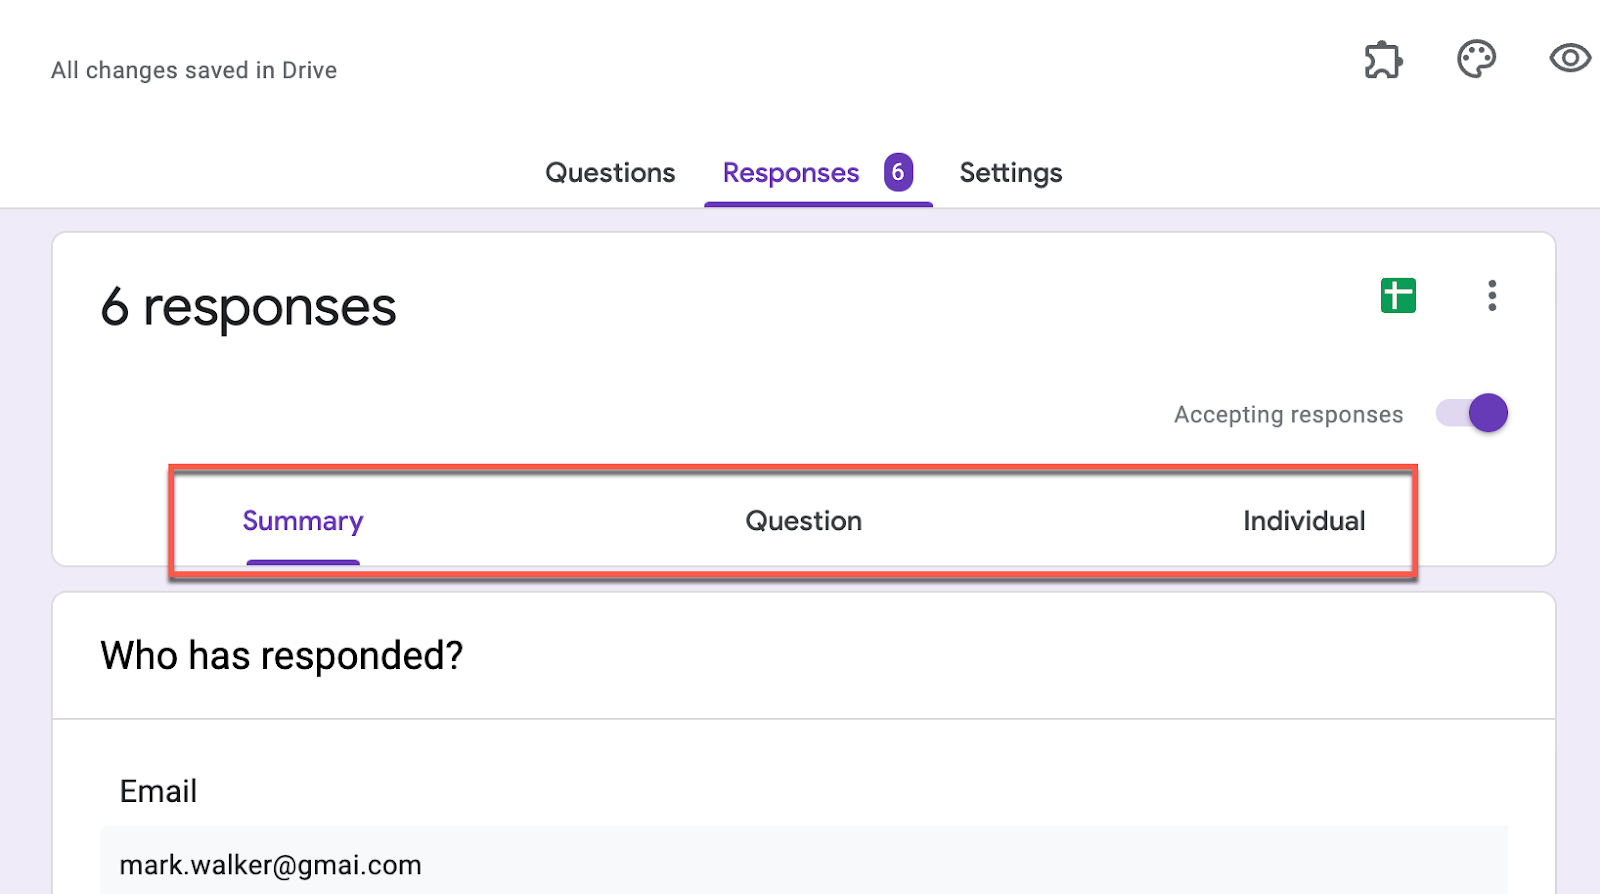
- View responses. Responses are collected in real time. Click on the "Responses" tab at the top of your form to see the answers. You can also create a spreadsheet in Google Sheets for a more detailed analysis.
Step 10: Next Steps
- Review and act on feedback. Use the insights gathered from your survey to inform decisions, make improvements, or further engage with your audience.
- Explore advanced features. Dive deeper into Google Survey Maker's capabilities, like adding logic-based questions or collaborating with others in real time.
By following these steps, you'll be able to create, distribute, and analyze surveys with ease using Google Forms Maker. Happy surveying!
Tips For Increasing Response Rates
Increasing the response rates for your surveys can be challenging, but with the right strategies, you can encourage more participants to take the time to share their thoughts and feedback.
1. Keep It Short and Sweet
People are more likely to complete your survey if it looks quick and easy. Try to limit your questions to the essentials. A survey that takes 5 minutes or less to complete is ideal.
2. Personalize Invitations
Personalized email invitations tend to get higher response rates. Use the recipient's name and possibly reference any past interactions to make the invitation feel more personal and less like a mass email.

3. Send Reminders
People are busy and may forget to complete your survey even if they intend to. Sending a polite reminder a week after your initial invitation can help increase responses. Make sure to thank those who have already completed the survey and only remind those who haven't.
4. Ensure Anonymity and Confidentiality
Assure your participants that their responses will be anonymous and that their data will be kept confidential. This can help you get more honest and thoughtful responses.
5. Make It Mobile-Friendly
Many people use their smartphones for almost everything. Ensure your survey is mobile-friendly so participants can easily complete it on any device.
6. Use Engaging Tools
Incorporating interactive and visually appealing tools like AhaSlides can make your survey more engaging. AhaSlides templates allow you to create dynamic surveys with real-time results, making the experience more interactive and fun for participants. This can be particularly effective for live events, webinars, or online courses where engagement is key.

7. Time Your Survey Right
The timing of your survey can impact its response rate. Avoid sending surveys during holidays or weekends when people are less likely to be checking their emails.
8. Express Gratitude
Always thank your participants for their time and feedback, either at the beginning or end of your survey. A simple thank you can go a long way in showing appreciation and encouraging future participation.
Key Takeaways
Creating surveys with Google Survey Maker is a straightforward and effective way to gather valuable insights from your audience. Google Survey Maker's simplicity and accessibility make it an excellent choice for anyone looking to collect feedback, conduct research, or make informed decisions based on real-world data. Remember, the key to a successful survey is not just in the questions you ask, but also in how you engage and appreciate your respondents.