Do you aspire to make your PowerPoint presentations look professional and easily recognizable? If you're seeking to add a watermark to your PowerPoint slides, you've come to the right place. In this blog post, we'll delve into the importance of a watermark, provide simple steps on how to add a watermark in PowerPoint, and even show you how to remove it when necessary.
Get ready to unlock the full potential of watermarks and take your PowerPoint presentations to the next level!
Table of Contents
- Why You Need A Watermark In PowerPoint?
- How To Add A Watermark In PowerPoint
- How To Add A Watermark In PowerPoint That Can't Be Edited
- Key Takeaways
- FAQs
Why You Need A Watermark In PowerPoint?
Why exactly do you need a watermark? Well, it's simple. A watermark acts as both a visual branding tool and a benefit to the professional appearance of your slides. It helps to protect your content, establish ownership, and ensure that your message leaves a lasting impression on your audience.
In short, a watermark in PowerPoint is an essential element that adds credibility, uniqueness, and professionalism to your presentations.
How To Add A Watermark In PowerPoint
Adding a watermark to your PowerPoint presentation is a breeze. Here's a step-by-step guide:
Step 1: Open PowerPoint and navigate to the slide where you want to add the watermark.
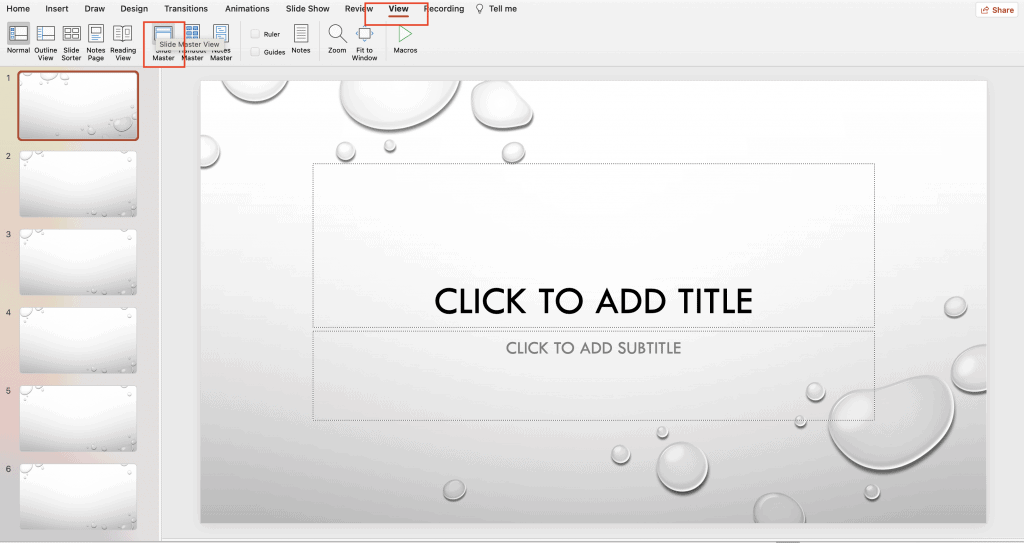
Step 2: Click on the "View" tab in the PowerPoint ribbon at the top.
Step 3: Click on "Slide Master." This will open the Slide Master view.
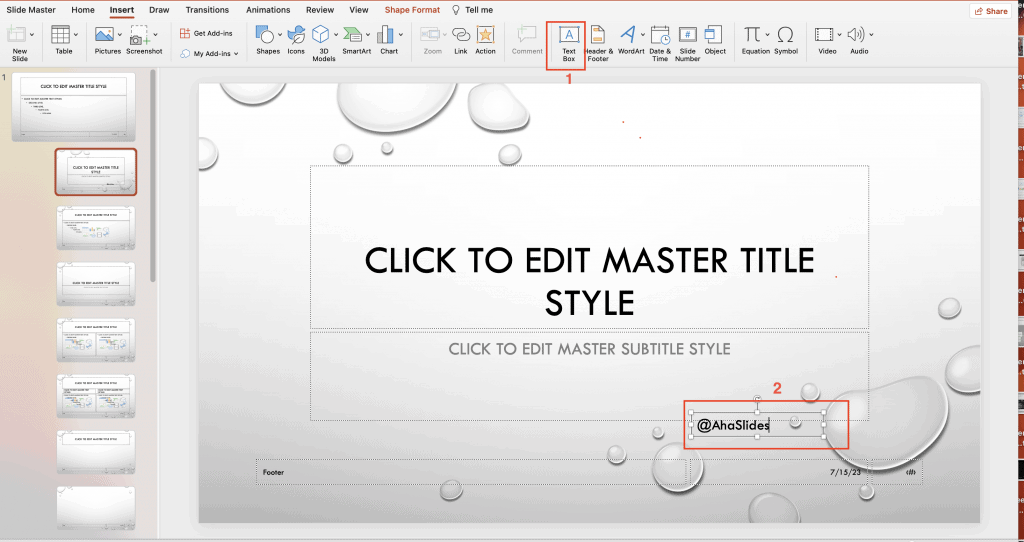
Step 4: Select the "Insert" tab in the Slide Master view.

Step 5: Click on the "Text" or "Picture" button in the "Insert" tab, depending on whether you want to add a text-based or image-based watermark.
- For a text-based watermark, choose the "Text Box" option, and then click and drag on the slide to create a text box. Type your desired watermark text, such as your branding name or "Draft," in the text box.
- For an image-based watermark, choose the "Picture" option, browse your computer for the image file you want to use and click "Insert" to add it to the slide.
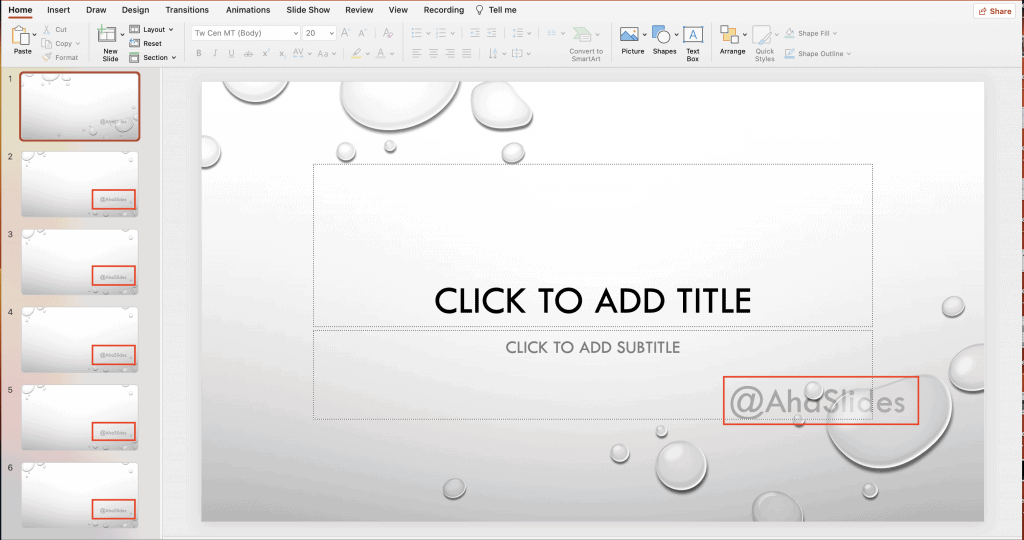
- Edit and customize your watermark as desired. You can change the font, size, color, transparency, and position of the watermark using the options in the "Home" tab.

Step 6: Once you are satisfied with the watermark, click on the "Close Master View" button in the "Slide Master" tab to exit the Slide Master view and return to the normal slide view.

Step 7: Your watermark is now added to all the slides. You can repeat the process for other PPT presentations if you want the watermark to appear.
That's it! By following these simple steps, you can easily add a watermark to your PowerPoint presentation and give it that professional touch.
How To Add A Watermark In PowerPoint That Can't Be Edited
To add a watermark in PowerPoint that cannot be easily edited or modified by others, you can use some techniques as follows:
Step 1: Open PowerPoint and navigate to the slide where you want to add the uneditable watermark.
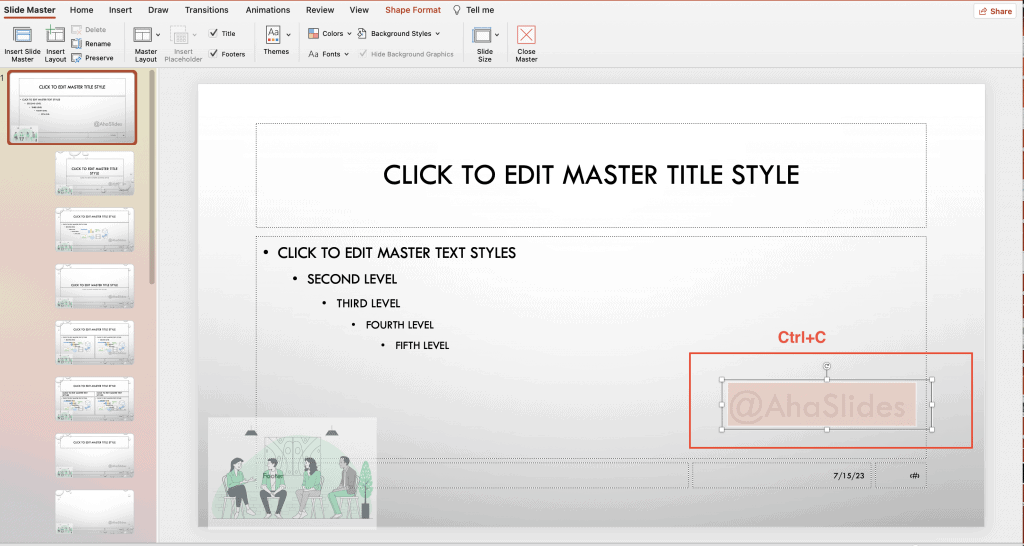
Step 2: Choose the Slide Master view.
Step 3: Copy the "Text" or "Image" option you want to use as the watermark.
Step 4: To make the watermark uneditable, you need to set the image/text as a background by copying it with "Ctrl+C".
Step 5: Right-click on the slide's background and select "Format Picture" from the context menu.

Step 6: In the "Format Picture" pane, go to the "Picture" tab.
- Check the box that says "Fill" and choose "Picture or texture fill".
- Then click the "Clipboard" box to paste your text/image as a watermark.
- Check "Transparency" to make the watermark appear faded and less prominent.

Step 7: Close the "Format Picture" pane.
Step 8: Save your PowerPoint presentation to preserve the watermark settings.
By following these steps, you can add a watermark to your PowerPoint slides that are more challenging to edit or modify by others.
Key Takeaways
A watermark in PowerPoint can enhance the visual appeal, branding, and protection of your presentations, whether you're using text-based watermarks to indicate confidentiality or image-based watermarks.
By adding watermarks, you establish a visual identity and protect your content.
Frequently Asked Questions
What is the Powerpoint Watermark?
A PowerPoint slide watermark is a semi-transparent image or text which appears behind the content of a slide. This is a great tool to protect intellectual intelligence, which also helps with copyright issues
How do you add a watermark in PowerPoint?
You can follow the 8 steps in the article we just provided to add a watermark in PowerPoint.
How do I remove a watermark from a PowerPoint presentation in Windows 10?
Based on Microsoft support, here are the steps to remove a watermark from a PowerPoint presentation in Windows 10:
1. On the Home tab, open the Selection Pane. Use the Show/Hide buttons to look for the watermark. Delete it if found.
2. Check the slide master - on the View tab, click Slide Master. Look for the watermark on the slide master and layouts. Delete if found.
3. Check background - on the Design tab, click Format Background and then Solid Fill. If the watermark disappears, it is a picture fill.
4. To edit a picture background, right-click, Save Background, and edit in an image editor. Or replace the picture entirely.
5. Check all slide masters, layouts, and backgrounds to fully remove the watermark. Delete or hide the watermark element when found.