The shift from in-person to virtual training has fundamentally changed how trainers connect with their audiences. Whilst the convenience and cost savings are undeniable, the challenge of maintaining engagement through a screen remains one of the biggest obstacles facing training professionals today.
No matter how long you've been leading training sessions, we're sure you'll find something useful in the online training tips below.
- What is Virtual Training?
- Why Virtual Training Matters for Professional Development
- Overcoming Common Virtual Training Challenges
- Pre-Session Preparation: Setting Your Virtual Training Up for Success
- Structuring Your Virtual Training for Maximum Engagement
- Driving Participant Engagement Throughout Your Session
- Interactive Tools and Activities to Enhance Learning
- Essential Tools for Professional Virtual Training
- Measuring Virtual Training Success
- Making Virtual Training Work With AhaSlides
- Your Next Steps in Virtual Training Excellence
- Frequently Asked Questions
What is Virtual Training?
Virtual training is instructor-led learning delivered through digital platforms, where trainers and participants connect remotely via video conferencing technology. Unlike self-paced e-learning courses, virtual training maintains the interactive, real-time elements of classroom instruction whilst leveraging the flexibility and accessibility of online delivery.
For corporate trainers and L&D professionals, virtual training typically includes live presentations, interactive discussions, breakout group activities, skills practice, and real-time assessments—all delivered through platforms like Zoom, Microsoft Teams, or dedicated virtual classroom software.
Why Virtual Training Matters for Professional Development
Beyond the obvious pandemic-driven adoption, virtual training has become a permanent fixture in corporate learning strategies for several compelling reasons:
Accessibility and reach — Deliver training to distributed teams across multiple locations without travel costs or scheduling conflicts that plague in-person sessions.
Cost efficiency — Eliminate venue rentals, catering expenses, and travel budgets whilst maintaining training quality and consistency.
Scalability — Train larger groups more frequently, enabling faster onboarding and more responsive upskilling as business needs evolve.
Environmental responsibility — Reduce your organisation's carbon footprint by eliminating travel-related emissions.
Flexibility for learners — Accommodate different working arrangements, time zones, and personal circumstances that make in-person attendance challenging.
Documentation and reinforcement — Record sessions for future reference, enabling learners to revisit complex topics and supporting continuous learning.
Overcoming Common Virtual Training Challenges
Successful virtual training requires adapting your approach to address the unique challenges of remote delivery:
| Challenge | Adaptation Strategy |
|---|---|
| Limited physical presence and body language cues | Use high-quality video, encourage cameras on, leverage interactive tools to gauge understanding in real-time |
| Home and workplace distractions | Build in regular breaks, set clear expectations upfront, create engaging activities that demand attention |
| Technical difficulties and connectivity issues | Test technology beforehand, have backup plans ready, provide technical support resources |
| Reduced participant engagement and interaction | Incorporate interactive elements every 5-10 minutes, use polls, breakout rooms, and collaborative activities |
| Difficulty facilitating group discussions | Establish clear communication protocols, use breakout rooms strategically, leverage chat and reaction features |
| "Zoom fatigue" and attention span limitations | Keep sessions shorter (60-90 minutes maximum), vary delivery methods, incorporate movement and breaks |
Pre-Session Preparation: Setting Your Virtual Training Up for Success
1. Master Your Content and Platform
The foundation of effective virtual training starts long before participants log in. Deep content knowledge is essential, but equally critical is platform proficiency. Nothing undermines trainer credibility faster than fumbling with screen sharing or struggling to launch a breakout room.
Action steps:
- Review all training materials at least 48 hours before delivery
- Complete at least two full run-throughs using your actual virtual platform
- Test every interactive element, video, and transition you plan to use
- Create a troubleshooting guide for common technical issues
- Familiarise yourself with platform-specific features like whiteboarding, polling, and breakout room management
Research from Training Industry shows that trainers who demonstrate technical fluency maintain participant confidence and reduce training time lost to technical difficulties by up to 40%.
2. Invest in Professional-Grade Equipment
Quality equipment isn't a luxury—it's a necessity for professional virtual training. Poor audio quality, grainy video, or unreliable connectivity directly impacts learning outcomes and participant perception of training value.
Essential equipment checklist:
- HD webcam (1080p minimum) with good low-light performance
- Professional headset or microphone with noise cancellation
- Reliable high-speed internet connection (backup option recommended)
- Ring light or adjustable lighting to ensure clear visibility
- Secondary device for monitoring chat and participant engagement
- Backup power supply or battery pack
According to EdgePoint Learning, organisations that invest in proper training equipment see measurably higher engagement scores and fewer technical disruptions that derail learning momentum.
3. Design Pre-Session Activities to Prime Learning
Engagement begins before the session starts. Pre-session activities prepare participants mentally, technically, and emotionally for active participation.
Effective pre-session strategies:
- Send platform orientation videos showing how to access key features
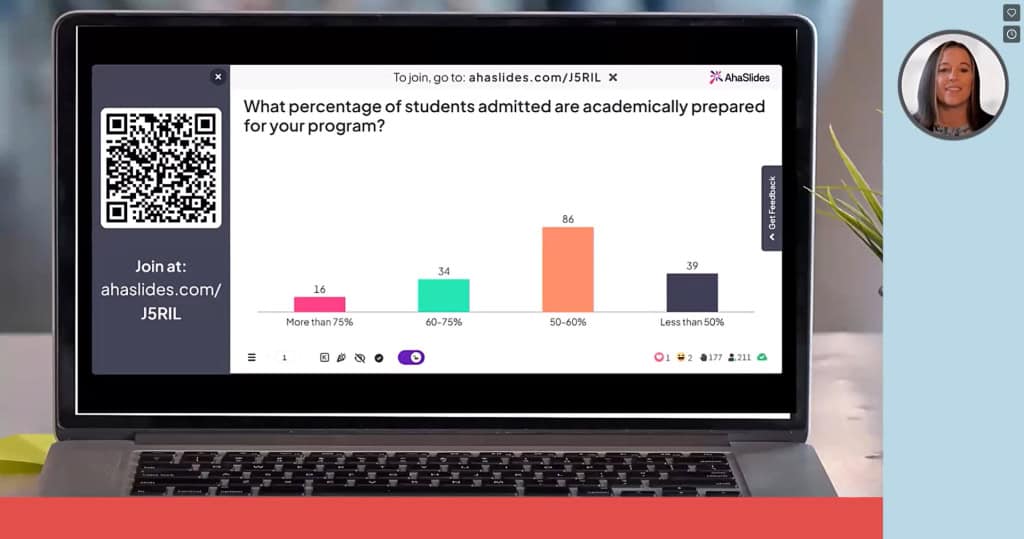
- Use interactive polls to gather baseline knowledge levels and learning objectives
- Share brief preparatory materials or reflection questions
- Conduct tech check calls for first-time platform users
- Set clear expectations about participation requirements (cameras on, interactive elements, etc.)
Studies show that participants who engage with pre-session materials demonstrate 25% higher retention rates and participate more actively during live sessions.

4. Create a Detailed Session Plan with Backup Strategies
A comprehensive session plan functions as your roadmap, keeping training on track whilst providing flexibility when unexpected challenges arise.
Your planning template should include:
| Element | Details |
|---|---|
| Learning objectives | Specific, measurable outcomes participants should achieve |
| Timing breakdown | Minute-by-minute schedule for each segment |
| Delivery methods | Mix of presentation, discussion, activities, and assessment |
| Interactive elements | Specific tools and engagement strategies for each section |
| Assessment methods | How you'll measure understanding and skill acquisition |
| Backup plans | Alternative approaches if technology fails or timing shifts |
Build contingency time into your schedule—virtual sessions often run differently than planned. If you're allocated 90 minutes, plan for 75 minutes of content with 15 minutes of buffer time for discussions, questions, and technical adjustments.
5. Arrive Early to Welcome Participants
Professional trainers log in 10-15 minutes early to greet participants as they join, just as you would stand at the classroom door welcoming students. This creates psychological safety, builds rapport, and provides time to address last-minute technical issues.
Early arrival benefits:
- Answer pre-session questions privately
- Help participants troubleshoot audio/video issues
- Create informal connection through casual conversation
- Gauge participant energy and adjust your approach accordingly
- Test all interactive elements one final time
This simple practice sets a welcoming tone and signals that you're approachable and invested in participant success.
Structuring Your Virtual Training for Maximum Engagement
6. Set Clear Expectations From the Start
The first five minutes of your virtual training session establish the learning environment and participation norms. Clear expectations eliminate ambiguity and empower participants to engage confidently.
Opening checklist:
- Outline the session agenda and learning objectives
- Explain how participants should engage (cameras, chat, reactions, verbal contributions)
- Review technical features they'll use (polls, breakout rooms, Q&A)
- Set ground rules for respectful interaction
- Explain your approach to questions (ongoing vs designated Q&A time)
Research from Training Industry shows that sessions opening with clear expectations see 34% higher participant engagement throughout the duration.
7. Keep Training Sessions Focused and Time-Bound
Virtual attention spans are shorter than in-person. Combat "Zoom fatigue" by keeping sessions concise and respecting participants' time.
Optimal session structure:
- Maximum 90 minutes for a single session
- 60-minute sessions ideal for maximum retention
- Break longer training into multiple shorter sessions across days or weeks
- Structure as three 20-minute segments with different activities
- Never extend beyond your stated end time—ever
If you have extensive content, consider a virtual training series: four 60-minute sessions over two weeks consistently outperform one 240-minute marathon session for retention and application.
8. Build in Strategic Breaks
Regular breaks aren't optional—they're essential for cognitive processing and attention renewal. Virtual training is mentally exhausting in ways that in-person training isn't, as participants must maintain intense focus on a screen whilst filtering out home environment distractions.
Break guidelines:
- 5-minute break every 30-40 minutes
- 10-minute break every 60 minutes
- Encourage participants to stand, stretch, and step away from screens
- Use breaks strategically before complex new concepts
- Communicate break timing upfront so participants can plan accordingly
Neuroscience research demonstrates that strategic breaks improve information retention by up to 20% compared to continuous instruction.
9. Manage Timing With Precision
Nothing erodes trainer credibility faster than consistently running over time. Participants have back-to-back meetings, childcare responsibilities, and other commitments. Respecting their time demonstrates professionalism and respect.
Time management strategies:
- Assign realistic time frames to each activity during planning
- Use a timer (silent vibration) to monitor segment duration
- Identify "flex sections" that can be shortened if needed
- Have optional enrichment content ready if you're ahead of schedule
- Practice your full session to accurately gauge timing
If a critical discussion runs long, explicitly tell participants: "This conversation is valuable, so we're extending this segment by 10 minutes. We'll shorten the final activity to end on time."
10. Use the 10/20/30 Rule for Presentations
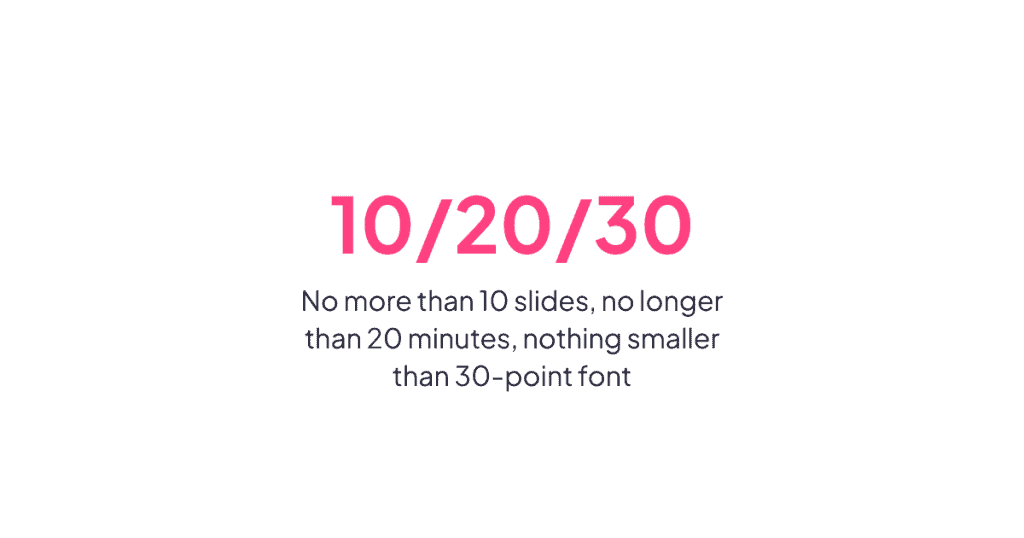
Guy Kawasaki's famous presentation principle applies brilliantly to virtual training: no more than 10 slides, no longer than 20 minutes, nothing smaller than 30-point font.
Why this works in virtual training:
- Fights "Death by PowerPoint" by forcing focus on essential information
- Accommodates shorter attention spans in virtual environments
- Creates space for interaction and discussion
- Makes content more memorable through simplicity
- Improves accessibility for participants viewing on various devices
Use your presentation to frame concepts, then move quickly to interactive application activities where real learning happens.
Driving Participant Engagement Throughout Your Session
11. Engage Participants Within the First Five Minutes
The opening moments set the participation pattern for your entire session. Integrate an interactive element immediately to signal that this won't be a passive viewing experience.
Effective opening engagement techniques:
- Quick poll: "On a scale of 1-10, how familiar are you with today's topic?"
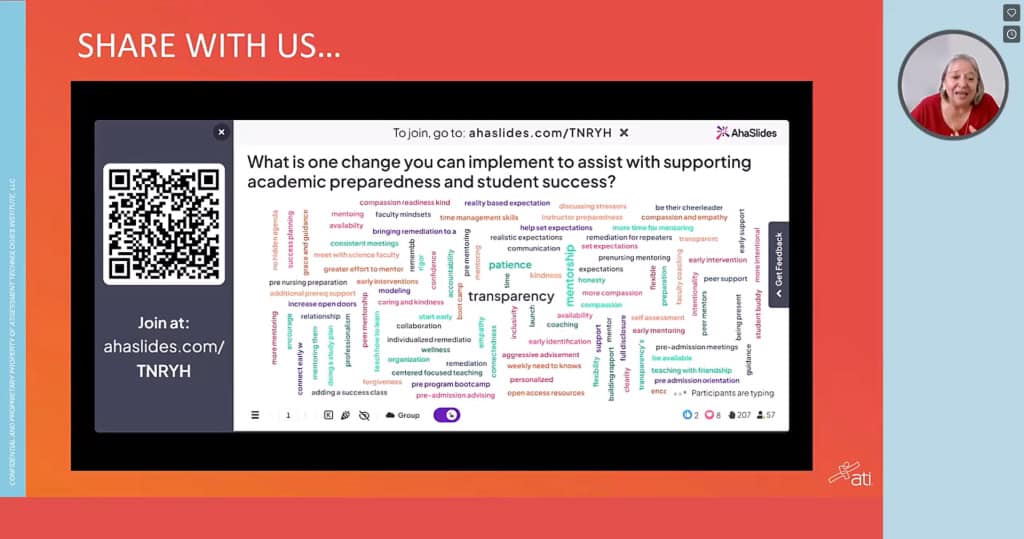
- Word cloud activity: "What's the first word that comes to mind when you think about [topic]?"
- Quick chat prompt: "Share your biggest challenge related to today's topic"
- Show of hands: "Who has experience with [specific situation]?"
This immediate engagement establishes psychological commitment—participants who contribute once are significantly more likely to continue participating throughout the session.
12. Create Interaction Opportunities Every 10 Minutes
Research consistently shows that engagement drops precipitously after 10 minutes of passive content consumption. Combat this by punctuating your training with frequent interaction points.
The engagement cadence:
- Every 5-7 minutes: Simple engagement (chat response, reaction, hand raise)
- Every 10-12 minutes: Substantive engagement (poll, discussion question, problem-solving)
- Every 20-30 minutes: Intensive engagement (breakout activity, application exercise, skills practice)
These don't need to be elaborate—a well-timed "What questions are coming up for you?" in the chat maintains cognitive connection and prevents passive viewing.
13. Leverage Strategic Breakout Sessions
Breakout rooms are virtual training's secret weapon for deep engagement. Small group discussions create psychological safety, encourage participation from quieter learners, and enable peer learning that's often more impactful than trainer-led instruction.
Breakout session best practices:
- Limit groups to 3-5 participants for optimal interaction
- Provide crystal-clear instructions before sending participants out
- Assign specific roles (facilitator, note-taker, timekeeper)
- Give adequate time—minimum 10 minutes for meaningful discussion
- Use breakouts for application, not just discussion (case studies, problem-solving, peer teaching)
Advanced strategy: Offer choice. Let breakout groups select from 2-3 different application activities based on their interests or needs. This autonomy increases engagement and relevance.
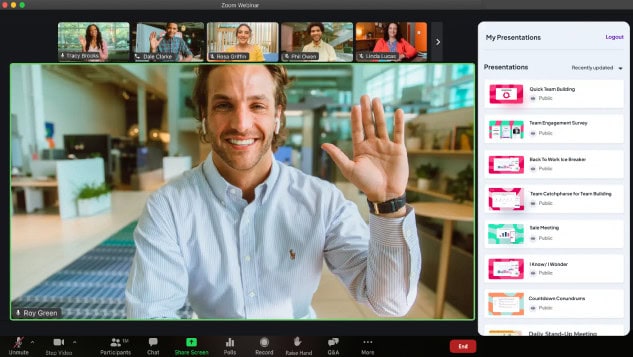
14. Encourage Cameras On (Strategically)
Video visibility increases accountability and engagement—when participants see themselves and others, they're more attentive and participative. However, camera mandates can backfire if not handled sensitively.
Camera-friendly approach:
- Request cameras on, don't demand it
- Explain why (connection, engagement, energy) without shaming
- Acknowledge legitimate privacy and bandwidth concerns
- Offer camera breaks during longer sessions
- Demonstrate by keeping your own camera on consistently
- Thank participants who enable video to reinforce the behaviour
Training Industry research shows that sessions with 70%+ camera participation see significantly higher engagement scores, but forced camera policies create resentment that undermines learning.
15. Use Participants' Names to Build Connection
Personalisation transforms virtual training from broadcast to conversation. Using participant names when acknowledging contributions, answering questions, or facilitating discussions creates individual recognition that motivates continued engagement.
Name usage strategies:
- "Great point, Sarah—who else has experienced this?"
- "James mentioned in the chat that... let's explore that further"
- "I see Maria and Dev both raising hands—Maria, let's start with you"
This simple practice signals that you see participants as individuals, not just anonymous grid squares, fostering psychological safety and willingness to take participation risks.
Interactive Tools and Activities to Enhance Learning
16. Break the Ice With Purpose
Icebreakers in professional training serve a specific function: building psychological safety, establishing participation norms, and creating connection amongst participants who will need to collaborate during the session.
Professional icebreaker examples:
- Roses and Thorns: Share one win (rose) and one challenge (thorn) from recent work
- Learning objectives poll: What do participants most want to gain from this session?
- Experience mapping: Use a word cloud to visualise participants' backgrounds and expertise levels
- Commonality discovery: Breakout groups find three things everyone shares (work-related)
Avoid icebreakers that feel frivolous or time-wasting. Professional learners want activities that connect to training objectives and respect their time investment.
17. Gather Real-Time Feedback Through Live Polls
Interactive polling transforms one-way content delivery into responsive, adaptive training. Polls provide immediate insight into comprehension, reveal knowledge gaps, and create data visualisations that make learning tangible.
Strategic polling applications:
- Pre-training assessment: "Rate your current confidence with [skill] from 1-10"
- Comprehension checks: "Which of these statements accurately describes [concept]?"
- Application scenarios: "In this situation, which approach would you take?"
- Prioritisation: "Which of these challenges is most relevant to your work?"
Real-time polling platforms enable you to immediately see response distributions, identify misconceptions, and adjust your training approach accordingly. The visual feedback also validates participants' input, showing them their responses matter.
18. Use Open-Ended Questions to Deepen Learning
Whilst polls and multiple-choice questions efficiently gather data, open-ended questions drive critical thinking and reveal nuanced understanding that closed questions miss.
Powerful open-ended prompts:
- "What would you do differently in this scenario?"
- "What challenges do you anticipate when applying this in your work?"
- "How does this concept connect to [related topic we discussed]?"
- "What questions remain unclear for you?"
Open-ended questions work brilliantly in chat, on digital whiteboards, or as breakout discussion prompts. They signal that you value participants' unique perspectives and experiences, not just their ability to select the "correct" answer.
19. Facilitate Dynamic Q&A Sessions
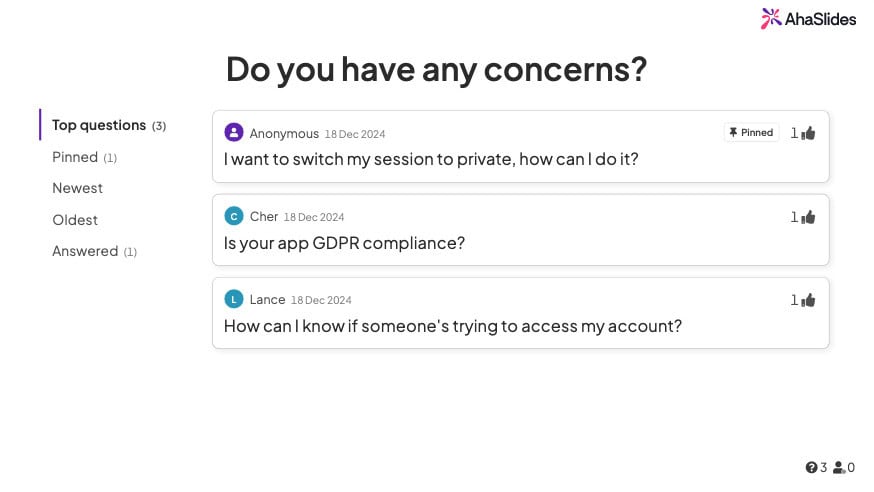
Effective Q&A segments transform from awkward silence into valuable knowledge exchange when you create systems that encourage questions.
Q&A best practices:
- Enable anonymous submissions: Tools like AhaSlides' Q&A feature remove the fear of looking uninformed
- Allow upvoting: Let participants signal which questions matter most to them
- Seed questions: "One question I often get is..." provides permission for others to ask
- Dedicated timing: Rather than "any questions?" at the end, build Q&A checkpoints throughout
- Acknowledge all questions: Even if you can't answer immediately, validate every submission
Anonymous Q&A platforms consistently generate 3-5x more questions than verbal or visible submissions, revealing gaps and concerns that otherwise remain unaddressed.
20. Incorporate Knowledge Checks and Quizzes
Regular assessment isn't about grading—it's about reinforcing learning and identifying areas requiring additional support. Strategically placed quizzes activate retrieval practice, one of the most powerful learning mechanisms available.
Effective assessment strategies:
- Micro-quizzes: 2-3 questions after each major concept
- Scenario-based questions: Apply knowledge to realistic situations
- Progressive difficulty: Start easy to build confidence, increase complexity
- Immediate feedback: Explain why answers are correct or incorrect
- Gamification: Leaderboards and point systems increase motivation without high stakes
Research from cognitive psychology shows that testing itself enhances long-term retention more effectively than re-reading or reviewing materials—making quizzes a learning tool, not just an evaluation method.
Essential Tools for Professional Virtual Training
Successful virtual training requires a carefully selected technology stack that supports your training objectives without overwhelming participants with tool complexity.
Core technology requirements:
Video conferencing platform — Zoom, Microsoft Teams, or Google Meet with breakout room capability, screen sharing, and recording features
Interactive engagement tool — AhaSlides enables live polls, word clouds, Q&A, quizzes, and audience response features that transform passive viewing into active participation
Digital whiteboard — Miro or Mural for collaborative visual activities, brainstorming, and group problem-solving
Learning management system (LMS) — Platform for pre-session materials, post-session resources, and tracking completion
Communication backup — Alternative contact method (Slack, email, phone) if primary platform fails
The key is integration: choose tools that work together seamlessly rather than requiring participants to juggle multiple disconnected platforms. When in doubt, prioritise fewer, more versatile tools over a complex ecosystem that creates friction.
Measuring Virtual Training Success
Effective trainers don't just deliver sessions—they measure impact and continuously improve. Establish clear success metrics aligned with your learning objectives.
Key performance indicators for virtual training:
- Engagement metrics: Attendance rates, camera usage, chat participation, poll responses
- Comprehension indicators: Quiz scores, question quality, application accuracy
- Satisfaction measures: Post-session surveys, Net Promoter Score, qualitative feedback
- Behavioural outcomes: Application of skills in work context (requires follow-up assessment)
- Business impact: Productivity improvements, error reduction, time savings (long-term tracking)
Gather feedback immediately after sessions whilst experiences are fresh, but also conduct 30-day and 90-day follow-ups to assess genuine behaviour change and skill retention.
Making Virtual Training Work With AhaSlides
Throughout this guide, we've emphasised the importance of interaction and engagement in virtual training. This is where AhaSlides becomes an invaluable tool for professional trainers.
Unlike standard presentation software that keeps audiences passive, AhaSlides transforms your virtual training into interactive experiences where participants actively shape the session. Your trainees can submit responses to polls, create collaborative word clouds, ask anonymous questions, and compete in knowledge-check quizzes—all from their own devices in real-time.
For corporate trainers managing large groups, the analytics dashboard provides instant visibility into comprehension levels, enabling you to adjust your approach on the fly. For L&D professionals designing training programmes, the template library accelerates content creation whilst maintaining professional quality.
Your Next Steps in Virtual Training Excellence
Virtual training isn't simply in-person training delivered through a screen—it's a distinct delivery method requiring specific strategies, tools, and approaches. The most effective virtual trainers embrace the unique characteristics of online learning whilst maintaining the connection, engagement, and outcomes that define excellent training.
Start by implementing 3-5 strategies from this guide in your next virtual session. Test, measure, and refine your approach based on participant feedback and engagement metrics. Virtual training mastery develops through intentional practice and continuous improvement.
The future of professional development is hybrid, flexible, and increasingly virtual. Trainers who develop expertise in engaging virtual delivery position themselves as invaluable resources for organisations navigating the evolving landscape of workplace learning.
Ready to transform your virtual training sessions? Explore AhaSlides' interactive presentation features and discover how real-time audience engagement can turn your training from forgettable to unforgettable.
Frequently Asked Questions
What's the ideal length for a virtual training session?
60-90 minutes is optimal for virtual training. Attention spans are shorter online than in person, and "Zoom fatigue" sets in quickly. For extensive content, break training into multiple shorter sessions across several days rather than marathon sessions. Research shows that four 60-minute sessions deliver better retention than one 240-minute session.
How can I increase participation from quiet participants in virtual training?
Use multiple participation channels beyond verbal contributions: chat responses, anonymous polls, emoji reactions, and collaborative whiteboard activities. Breakout rooms in small groups (3-4 people) also encourage quieter participants who find large group settings intimidating. Tools that enable anonymous submissions remove the fear of judgment that often silences hesitant learners.
Should I require participants to keep their cameras on during virtual training?
Request cameras on rather than demanding them. Explain the benefits (connection, engagement, energy) whilst acknowledging legitimate privacy and bandwidth concerns. Research shows 70%+ camera participation significantly improves engagement, but forced policies create resentment. Offer camera breaks during longer sessions and lead by example by keeping your own camera consistently on.
What technology do I need to deliver professional virtual training?
Essential equipment includes: HD webcam (1080p minimum), professional headset or microphone with noise cancellation, reliable high-speed internet with backup option, ring light or adjustable lighting, and a secondary device for monitoring chat. Additionally, you need a video conferencing platform (Zoom, Teams, Google Meet) and interactive engagement tools like AhaSlides for polls, quizzes, and audience participation.


